

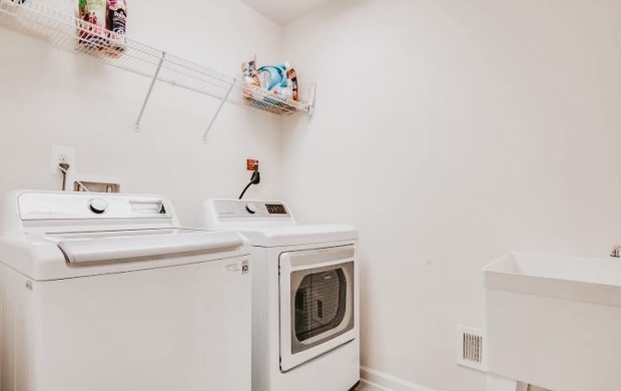
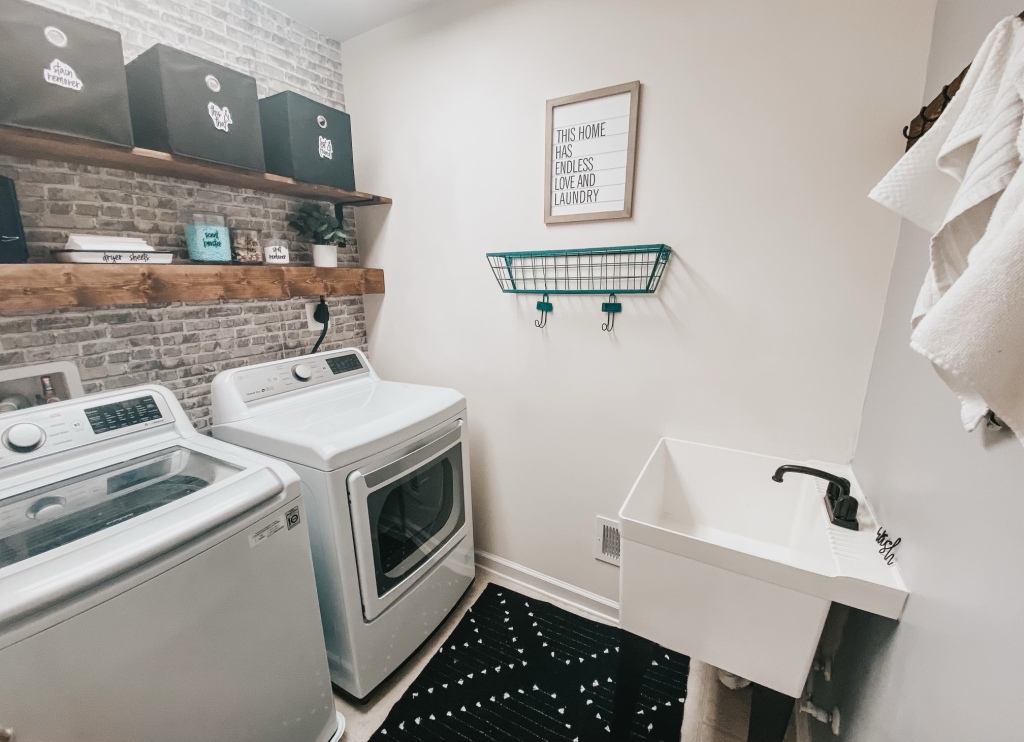
As other Mamas can attest to, a laundry room with little ones is one of the most used rooms in the house. Our laundry room was your typical builder grade laundry room, it got the job done but it was pretty plain with wire shelving and your standard utility sink. Here’s a before picture:
I had three main ideas for the makeover which included wallpaper, updating the utility sink and adding new shelving. First i’ll start with the supplies!
Supplies
Floating shelf wood/cut list (DIY Floating Shelves {Free Plans} – Sawdust Sisters)
Stain for the shelves (Dark Walnut)
Staining Sponge
Plastic Gloves
Sander
Mitre Saw
Ryobi Drill
Ryobi Nail gun
Shelf Brackets
Kreg Jig Set
Kreg Jig Screws
Wallpaper
Wallpaper scraping tool
Zinsser spray paint primer
Rustoleum Modern Farmhouse Metallic Black Paint + Primer
Plastic tarp
Small Empty Box
Step 1: Wallpaper
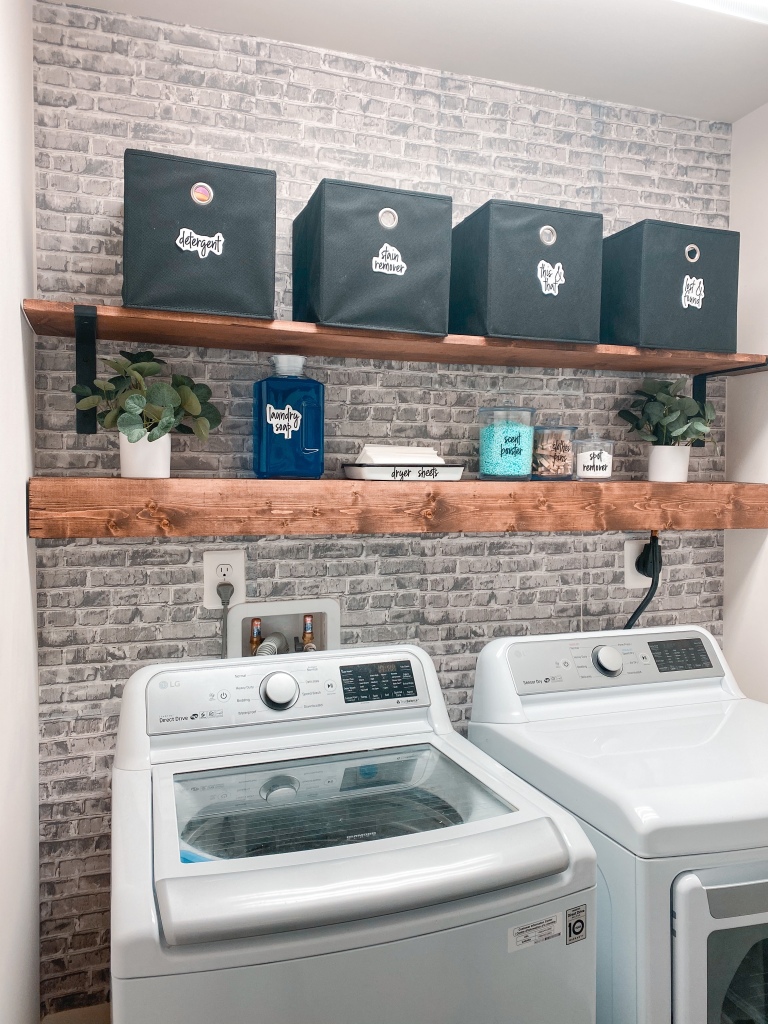
When we first moved in I actually started the makeover and had half the wall covered in wallpaper. I actually ran out of wallpaper and never finished it. I got a peel and stick wallpaper from Amazon it was $8 a roll so really affordable. I think I got 3 rolls and had to buy 3 more. Since I only had to do the upper half of the wall I measured the length from the top of the wall to where the other wallpaper started. It was about 28 inches so I cut my strip before I placed it on the wall. The brick pattern was actually pretty easy to match strips together, just be sure to pay attention to your pattern when youre placing the wallpaper. Use the smoothing tool to get rid of any bubbles.
Step 2 : Floating Shelf & Bracket shelf
I saw this great tutorial on sawdustsister.com on building a DIY floating shelf and decided to give it a try. I followed everything exactly on there (of course adjusting the measurements to my space). I got to use my mitre saw to make the cuts which was exciting lol I made a couple mistakes with the cuts along the way but I always get spare pieces of wood to account for that (especially being a newbie at using it). I initially envisioned the floating shelf as the main shelf but I realized the depth wasn’t quite wide enough to hold baskets and all the things I had in the laundry room. I decided to do another larger shelf. I got a plain 1 x 10 for the shelf so that it had enough depth. I decided to use a dark walnut stain for both shelves.
Step 3 : Install the shelves
Following instructions on sawdustsister.com I secured the support board to the wall and the floating shelf on top of that. I actually did a screw on the top of the shelf (in the back which wasnt visible) just to further secure it. Be sure to use your level when putting up both the support board and the bracket for the shelving.
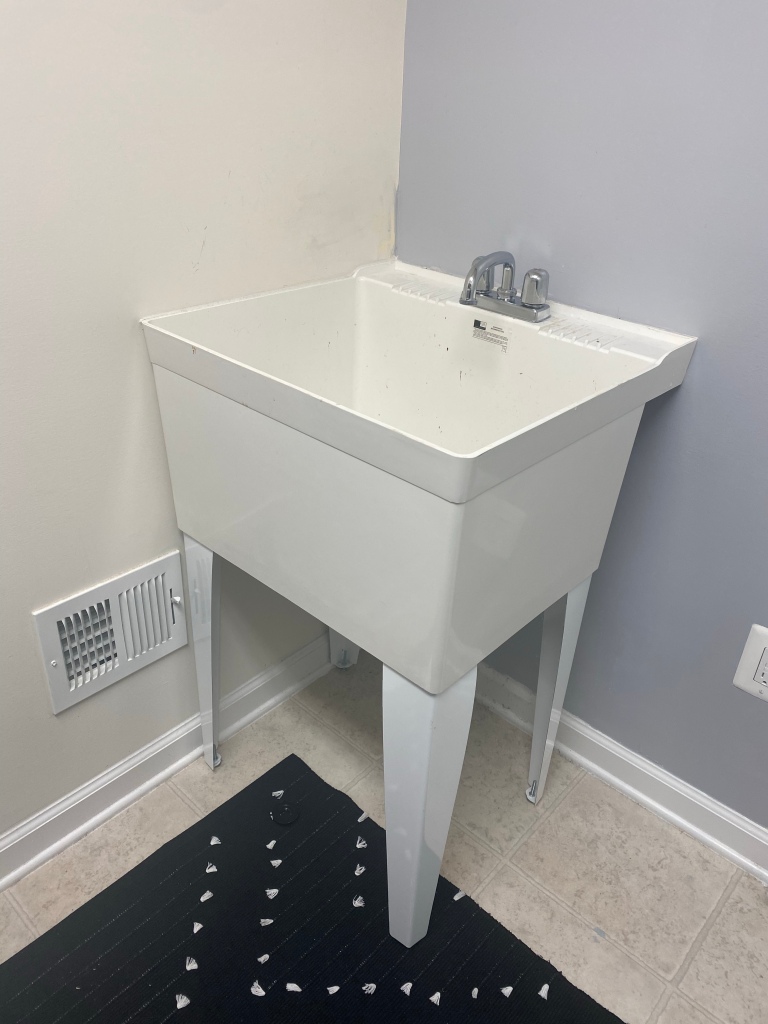
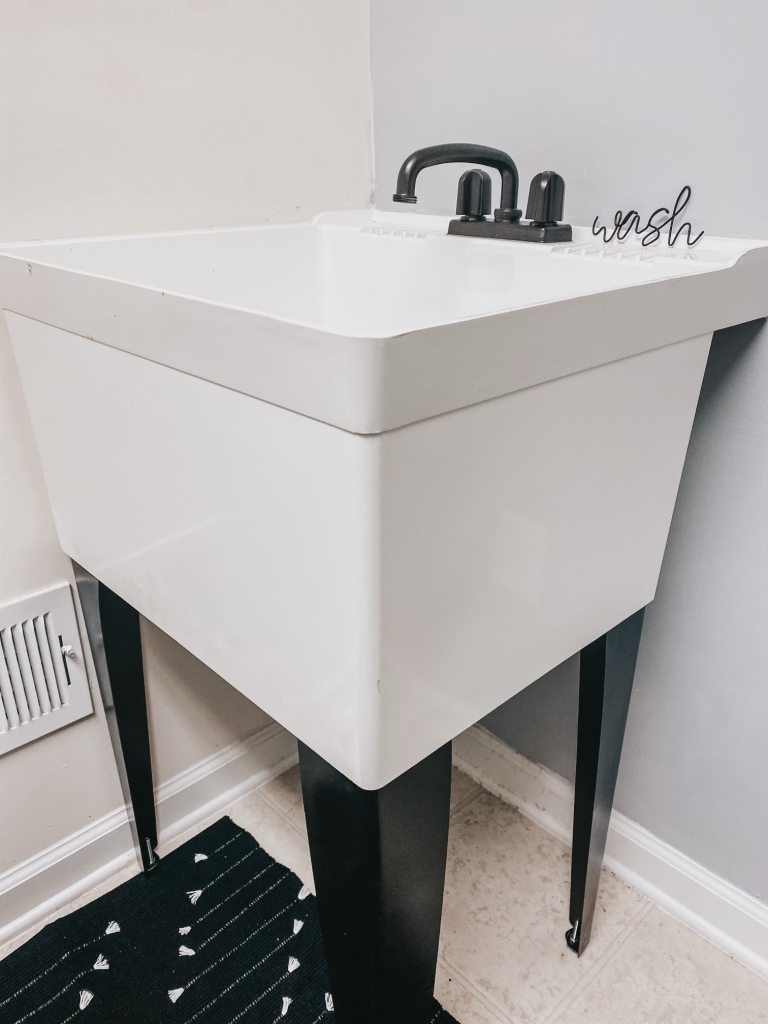
Step 4 : Utility Sink update
The utility sink project was much easier than I thought it would be! I did two things – spray painted both the facuet and knobs and sink legs a metallic black. Before removing anything first figure out how to shut off the water supply to your sink. Then unscrew the plumbing in the back so you can completely remove the faucet. I traced two holes in an empty box where the gold plumbing sticks into the sink to make it easier to spray paint and hold it up. I wiped it down and lightly sanded the fixture before priming. I used the Zinsser primer on the faucet fixtures but I did not when I spray painted the legs of the utility stink because the spray paint I used was a paint + primer. The legs surprisingly came off the utility sink easily which is why I decided to spray paint them. If your legs cant easily be removed I would used a primer and regular paint. I did one coat of primer and 2-3 coats of the spray paint for even coverage. With spray paint more is less, its better to do thin even layers than to pile it on.
That’s it you guys! Stay tuned for a full video on all of these steps 🙌🏻 thanks for reading! Here are some more after pictures!!
This post contains affiliate links, meaning, at no additional cost to you, we will make a commission if you click through and make a purchase. Thanks for the support!
