

We are so excited to share one of our biggest projects yet! This project was a multiple week project (working full time and Mom-ing delays). It was definitely challenging and we came across quite a few roadblocks but the end result was totally worth it. Here’s the closet before:

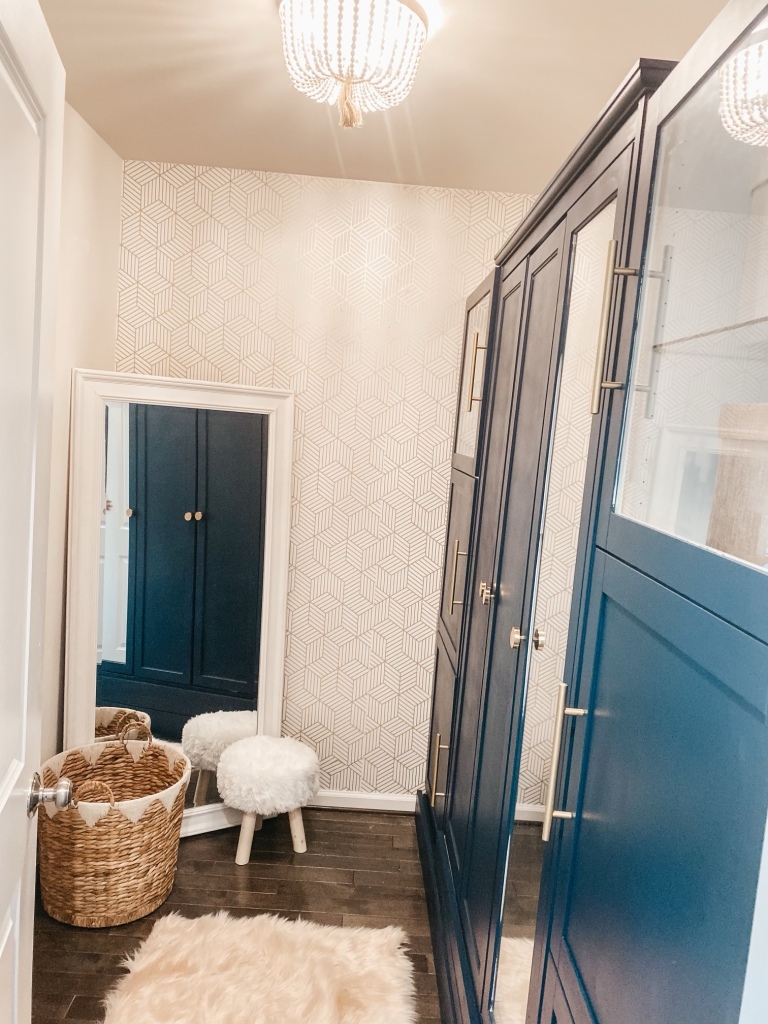
and here’s the closet after:
Supplies
Cabinets/Shelving (I found ALL of these pieces on Facebook Marketplace)
- Paint (for your shelf and wall)
- Paint Brush Roller
- Paint Brush
- Paint Tray
- Painters Tape
- Mitre Saw (or get cut at the store)
- Ryobi Drill
- Drydex spackle
- Putty Knife Scraper
- Wallpaper
- Level
- 1x 2’s length of wall
- 1×2 cut to length for support boards
- 1×6 cut to length of wall
- Sanding sponge
- New light fixture
- Polyurethane sealant.
Step 1: Remove Existing Shelves and Hardware & Patch
After our closet was cleared of everything like clothes, shoes bags etc (which for us was no easy feat), we removed the existing shelving. We had to use our step ladder to get the taller shelves. We started by using our drill to remove all the screws and then pulling out the anchors. Once all the shelving, screws and anchors were out we used our drydex to fill in all the holes that were left. Drydex is nice because it goes on as a purple-ish color and then changes to white when its dry. After it dried we sanded all the holes.
Step 2: Install Wallpaper
We decided to add a small accent wall on the small wall in the closet. If you’re not doing wallpaper here is the step that you would paint the closet. Since our cabinets would be filling up the whole space on one side of the closet, and wallpaper on the other we decided we wouldn’t paint the other wall but rather just leave it white. The wallpaper really added to the style of the room and was so easy to put up. We actually had this wallpaper leftover from a project we’d done at our Mom’s house so we did actually end up running out of it and had to order another roll and put it up later.
Step 3: Build Base
Here comes the harder part! We actually followed an Instagram reel from Phillip_or_flop as the main concept for the base of our closet. The purpose of the base is to raise the cabinets to the same height and to be able to add the front trim so that it all looks built in. Without the base ,the cabinets would sit on the floor and no trim could be added without blocking the ability to open the cabinets. Additionally the cabinets can be anchored into the base (and not your floor). The base consists of 1×2’s and 1×6’s. Two 1 x 2’s are placed on its side for the base and connected with 1×2’s measured to the depth you want the base to be. This is determined by the depth of your furniture. After the 1×2’s are secured (Use the wall for leverage which means doing one side and then flipping it over to do the other) I laid down 3- 1×6’s that are the width of the wall. Visuals will make this section make much more sense:


Step 4: Move Light Switch
The first major problem was the realization that the light switch was on the wall that would be covered by the cabinets and therefore unreachable. We debated either getting a light switch with a remote or rigging it to be able to stick something on the side of the cabinets and still be able to switch it up and down but we decided we didn’t want to spend all the time and effort on the closet and cut corners. We asked a friend who tackles a lot of DIY projects who suggested switching the outlet to the other side of the wall which would place it right outside the closet in the hallway that leads to our bathroom. I removed the light switch plate and of course turned off the breaker for the closet. We pulled out the wiring and cut a hole directly to the other side. There is an electrical box cover that had to be turned around, we traced the plate on the other side of the wall and cut a hole a bit smaller than the plate for the new outlet position. After that we re did the wiring and it was done! We were pretty excited when I got it all back together and the light switch actually turned back on!
Step 5: Install New Light Fixture
We couldn’t spend all this time re doing the closet and not swap out the not so pretty globe light! We found this inexpensive light fixture from Amazon Here and got it re-wired and installed.

Step 6: Spray Paint Hardware
The hardware that came with the cabinets was silver. A good tip for spray painting hardware is to poke small holes in a box to push the screws through so that the hardware sits on top of the box and can be easily spray painted. We used a pray paint primer for the first layer followed by this Rustoleum spray paint.
Step 5: Install Trim Cover
We used a 1×6 and 1×4 for the front trim. You’ll want to measure from the height of your floor to the bottom of the cabinets you’re using. The idea is to hide the bottom feet of the cabinets to give the illusion that theyre built in. We used our Ryobi nail gun to secure it to the base and bottom of the cabinet.
Step 6: Paint Cabinets
As we mentioned above we found every one of the cabinets on Facebook Marketplace. All 3 of the pieces are from Ikea, the middle cabinet is the Aspelund series and the two on the sides are the Besta storage cabinets. We actually bought the pieces from two separate postings and weren’t exactly sure how we would configure it in the closet. After measuring each they happened to fit one whole wall with a few inches to spare. We did two layers of Kilz primer because if you’ve ever painted an Ikea piece before its crucial to get a good base for the paint to adhere to. We did about 3-4 coats of the Navy paint. We took individual cabinets out and painted them while in the closet and then installed them and did one more final coat. Dont forget to paint the trim to match the cabinets. We a used a polyurethane sealant and did two coats.
Step 7: Secure the Cabinets
We secured the cabinets with long screws that we put directly from the cabinet to the base that we built. We used roughly 6 screws per cabinet. We ended up using two screws from the cabinet to the side wall for the cabinets that were on the end just to further secure them.
That’s it!! We are SO happy with how it turned out. The inside of the cabinets have so much space for storage with a lot of shelves. The Ikea Aspelund also has a rod for hanging things (we hung dresses) otherwise everything else is folded.

This post contains affiliate links, meaning, at no additional cost to you, we will make a commission if you click through and make a purchase. Thanks for the support!
