
One of the first projects we did in our house was this fireplace. The brick and gold doors (not pictured) completely dated the whole living room. I did a lot of research to figure out if brick could be painted in a fireplace and was happy to find paint made for extreme temperatures even though I was just painting the outside. With our kids being so little when we moved in (3 months & 2) we knew we wanted to get rid of the brick hearth so we didn’t have to hold our breath every time they played near it. We decided to remove it and replace it with tile. We also replaced the doors and gave it the final touch with the faux mantle beam 😍 Here is the before picture:

Supplies
- New glass doors
- Primer (made for brick)
- Kilz Masonry Paint
- Rough Surface Roller
- Paint Brush
- Paint Tray
- Painters Tape
- Wire Scrub Brush
Step 1: Prep the Surface
As always, prepping the surface is very important. First, you want to clean the brick. To clean the brick you will want to use a wire brush and soapy water. I laid down plastic all around my fireplace because I knew when I scrubbed, particles would fall off. I used a medium sized bowl to fill it with warm water and soap to dip the wire brush in and scrub away. The cleaner the surface, the better the paint will adhere and absorb. You want to wait until the brick is completely dry before moving to the next step.
Step 2: Prime the Surface
Priming the brick is important to allow the paint layer to really adhere. Kilz is always our go to primer and they have one that is meant for masonry and brick so I used that for this project. Before I began painting, I used painters tape to tape off all the areas around it that I didn’t want to get paint on. I also took off the doors completely because I wanted to replace the gold doors for something more modern. The priming steps here will be the same steps you follow for painting. I used a roller that is made for rough surfaces. You will use this primarily and a paint brush to fill in holes or gaps that are missed by the roller or the sides and edges that were hard to get to with the roller. I poured the paint into a paint tray and lightly rolled by roller brush into it. You don’t want the paint to drip off of it and lay on too thick. Since this is just the primer, it won’t look perfect but you want to cover the entire surface. Once you have covered the surface you want to allow the primer to dry for around 24 hours or check the dry time on the primer you used.

Step 3: Paint the Fireplace
Now that the surface is all primed and ready to go, you will follow the same steps you did for the primer. Use a combination of your roller and paint brush to evenly coat the fireplace. I did 2 or 3 coats, following the dry time in between.
Other Updates:
-We also removed the hearth of the fireplace and replaced it with tile. My husband did the tiling and removing of the brick hearth but I got a lot of pictures along the way. Comment if you are interested in hearing the breakdown on how to do this and we can do another post!
-We replaced the fireplace doors with ones we bought on Amazon. This made a HUGE difference. The main thing to look for when finding a replacement door is the size. You have to measure the opening of your fireplace so you can select the correct door.
-Added a Faux beam to the mantle. Click here for a detailed post on how to do this.
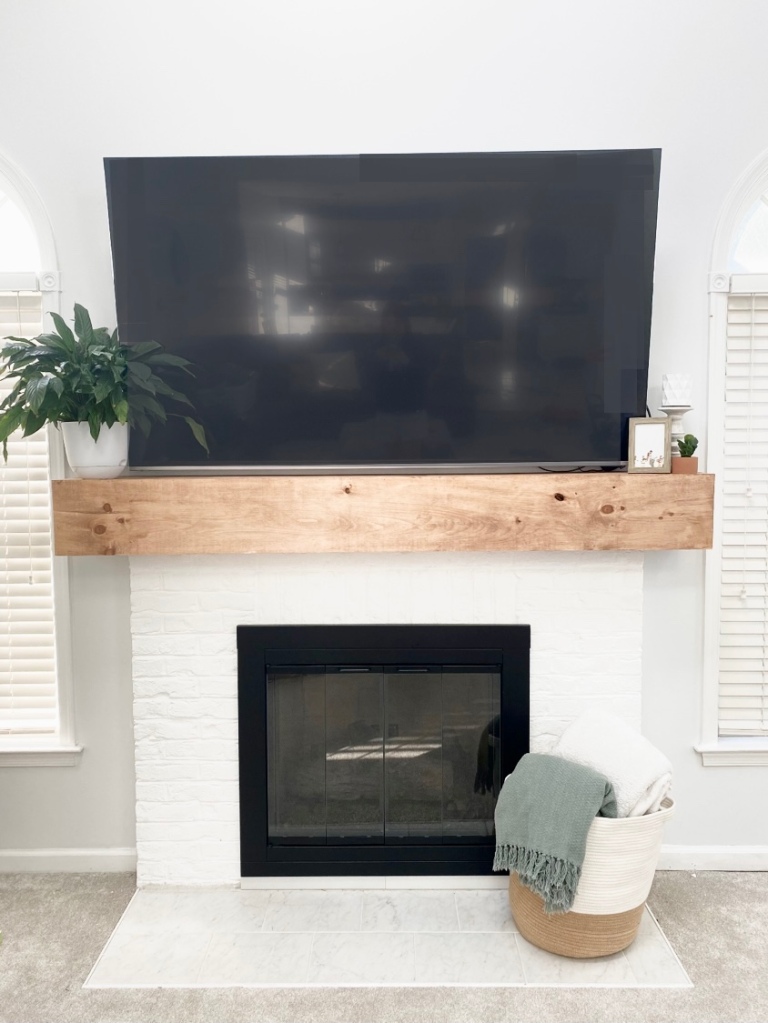
The After!
This post contains affiliate links, meaning, at no additional cost to you, we will make a commission if you click through and make a purchase. Thanks for the support!
