
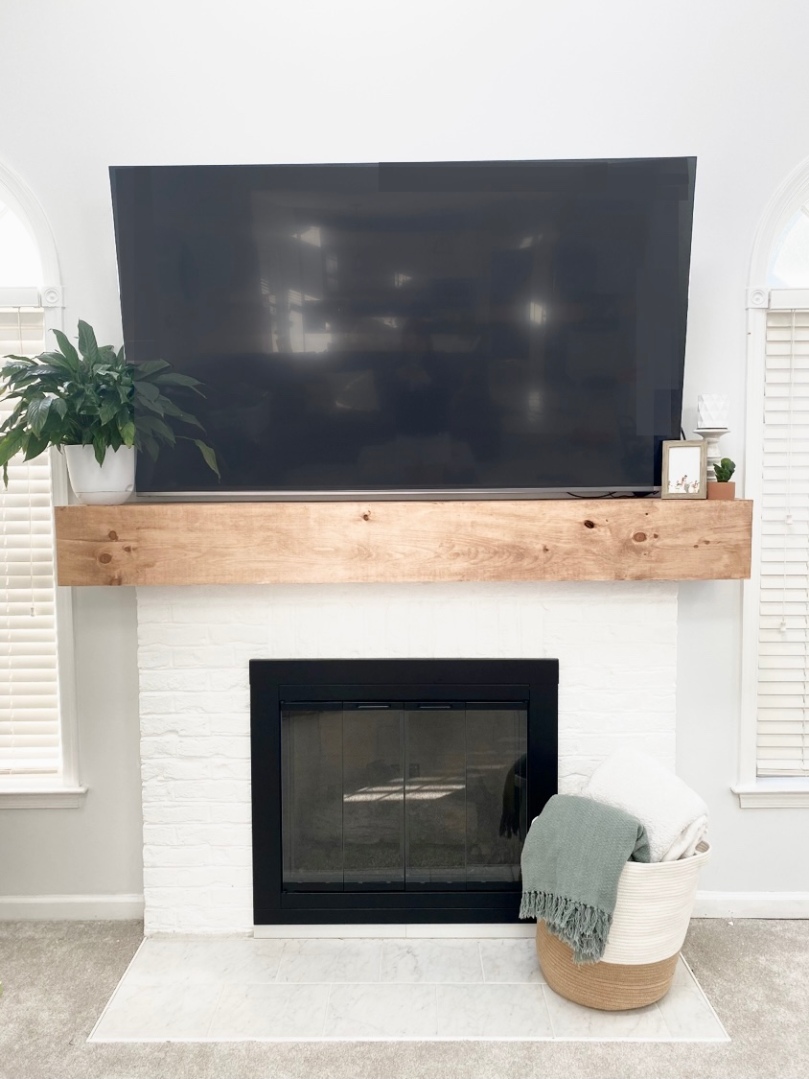
This chunky faux beam project only took about an hour! We love the rustic charm it brought to the space. After browsing Pinterest and seeing people mimic a real wood mantle by making a “shell” around the existing mantle we had to try it. By doing it this way, you don’t have to take off any of the existing mantle piece, it just sits on top. You don’t even screw it into the mantle, just the pieces into each other.
Supplies
- Pine Board (according to mantle measurements)
- Ryobi Airstrike (its possible to use a hammer and nails)
- Wood Filler
- Sanding sponge
- Stain
- Disposable
- Staining Pad
Step 1: Measure
When you measure it, you want to measure 3 things. The length of the mantle ( this was 76.5 in), the width of the mantle (how deep it is -this was 8.5in) and the height of the mantle shelf (how tall you want the board to be- this was 9.5in.) the picture below will help describe these three measurements:


Step 2: Get the Lumber
The size of the wood you need varies on the size of your mantle. My mantle was 76.5 inches in length (picture 1) , 9 1/2 inches wide (picture 2) and 8 1/2 in tall (picture 3). Overall you will need 4 pieces: The top piece, the front piece and the two sides. Given my dimensions, I decided to go with 2- 1×10 boards because 1×10 boards are actually 9 1/4 inches which was the perfect size to cover the length of the mantle.
I got one of them at 7ft since my mantle width is just over 6ft. Add TWO INCHES to the length of your mantle and that’s what you will cut this piece down to. I cut it down to 78.5 inches since my length was 76.5 inches. This is necessary to allow room for the two side pieces.
The second board I got was 10ft to be cut down for the front of the mantle and the two sides. For the front of the mantle, use the same measurement as the top piece (add two inches to your length). So I cut it down to 78.5 inches just like the first piece. The side pieces should be an inch less than the width and the height of your front and top board (8.5 inches for the width since my width was 9.5 and 7.5 inches for the height since my height was 8.5 inches ). You want two at this measurement.
In summary, you will have 2 pieces cut to the length plus 2 inches and 2 pieces for the sides that are an inch less than the width and height.
Step 3: Stain it
Lay out all of your boards, I use my garage for staining and painting. When staining you also want to use gloves. Make sure you mix the stain well. You can use any color stain that you want. We love the Varathane brand stain. To stain the board, dip your cloth in the stain and then rub it across the board. You don’t want to oversaturate it, a little goes a long way. You only need one coat for stain.
Step 4: Put it Together
Putting it together is easiest with two people. You will start with the two longest boards (top and front of the mantle). Lay the top board on the top of your mantle and hold the front board up to it like the picture below. Use the nail gun across the front piece to nail it to the top piece.

Next, fit the side pieces on and nail it from the top and the front! The last step is optional. Since it’s rustic it may not matter to some but you can fill in the nail holes with wood filler, sand it and stain over it so you can’t see the nail holes. Step back and enjoy it in all its rustic beautiful glory!

This post contains affiliate links, meaning, at no additional cost to you, we will make a commission if you click through and make a purchase. Thanks for the support!
