

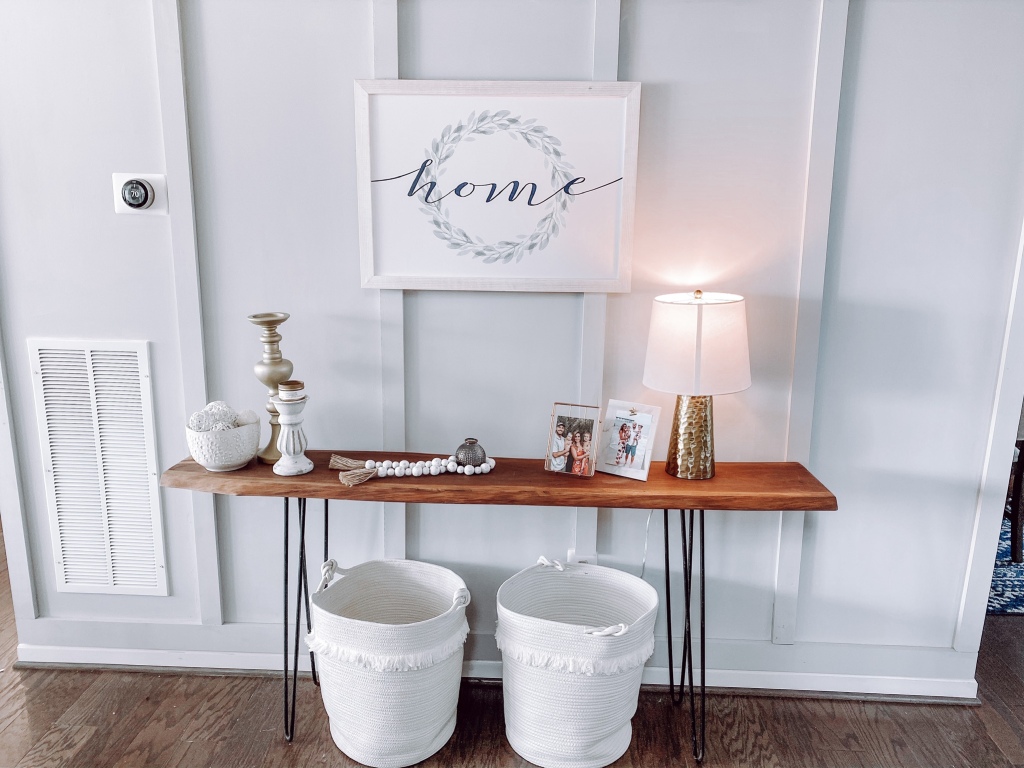
Our front entry hallway was basically just a long wall. We at one time had a bench and some decor on the walls and then I changed to a console table. This project took only a day and totally transformed the space. Here is the space before:

Supplies (linked to Amazon if you don’t have it already)
- Top Board (1) 1×4 (cut to the length of your wall)
- Bottom Board (1) 1×4 (cut to the length of your wall)
- Top Shelf (1) 1×1 (cut to the length of your wall wa1l) Note: all 3 of these top, bottom and shelf were 116.5 inches for our wall
- Boards (6) 1×3’s at 5.5 ft (cut to the desired height of your board and baten wall)
** For all the boards used the unfinished Pine Common boards from Home Depot be sure to lay them on the ground and get the flattest ones possible. The pine boards tend to bow and they wont lay flat on the wall. - Brad Nailer Gun
- White Painters Caulk
- Caulking Gun
- Wood Filler
- Sanding sponge
Step 1: The Math (the not so fun part)
The first (and hardest step in our opinion) is figuring out the spacing of your boards. The total length of our wall was 9ft 8.5 inches. Its best to convert to inches to figure out the math. The total wall length for us was 116.5 inches. We had a vent in our space and that had to be considered when figuring out the space between boards. Obviously you cant put a board over a vent so you need to make sure the spacing is adjusted accordingly. We did have an outlet we had to cut around but its not as noticeable as a large vent would be.
The math: length of the wall (116.5 inches) minus the width of the boards (2.5 inches as confusing as it is 1×3 boards are actually 2.5 inches wide) divided by the number of boards you want (5 for us) and that gives you the spacing between each board.
116.5 (length of the wall) -2.5 (width of the boards) = 114inches
114 inches /5 (number of boards) = 22.8 inches
Our spacing then comes out to 22.8 inches between boards. As a general rule of thumb you want as close to 2ft as possible between boards.
Step 2 : Paint Your Wall
Phew now that the math is over with! Its time to prep your wall for paint. Give it a good wipe down with a paper towel and some water to clean the wall. If there are any uneven spots use your sanding sponges to smooth it down. Paint the wall the color of your choice. We went with a gray color. We painted our wall, secured the boards and then painted the boards (since youll be filling in holes with wood filler it made sense to us to paint the boards later but its whatever you prefer).
Step 3: Secure The Boards
Anchor the boards to the wall. We started with the bottom board and lined it up with our baseboard (you can also use a level to make sure its leveled out/even). Its easier to have two people for this part, one holding the board up and the other use the brad nail gun to secure it to the wall. We didn’t use any real method for the brad nail gun just make sure there are no gaps and everything is properly secured to the wall putting nails every 5 inches or so. Next we put up the 5 other boards. Its a good idea to line up or lay all the boards before securing them so you can make sure the space between each of them is equal. We had one board that fell directly over an outlet so we measured the space from the floor to the outlet bottom, and then the top of the outlet to the top of the Board and Baten wall so we could cut out the size of the outlet. After the middle boards are secured its time to do the top board. Again use your level to make sure its leveled out. Lastly the shelf (the 1×1) is placed on top of the top board (say that 3x fast).
Step 4: Fill in Holes and Sand
After the boards are secured to the wall use your wood filler to fill in all the holes from the nail gun. Let it dry completely and then use your sanding sponge to smooth it out.
Step 5: Caulking
The last step is to fill in any gaps with caulk. Be sure to get paintable caulk. We used a white caulk for ours but the color doesn’t necessarily matter as long as its paintable. We used our caulking gun and went along every seam/crevice to fill in spots where the wood didn’t lay exactly flush on the wall. As done with the wood filler, let it dry and then smooth everything out with your sanding sponge.
Step 6: Paint the Board and Baten Boards
You’re almost there! The final step is to paint the board and baten boards the same color you used for the wall. We ended up doing 3 coats of paints. Darker colors typically need less coats but light grays/whites usually take a few coats to get an even and finished look.

Step 7: YOU DID IT!
STARE AT THE FINISHED PRODUCT! You’re done 😉
Thank you for reading our post! If you decide to take on the project and use our steps we would love to see your final results (tag us on instagram @twinfixdiy)

This post contains affiliate links, meaning, at no additional cost to you, we will make a commission if you click through and make a purchase. Thanks for the support!
